|
I (Jessi) started doing magazine scavenger hunts before starting a collage project or opening the collage center. This activity only takes about 20 minutes to do with students and helps organize the magazines. It also actively engages students to kick start their thinking about what elements they would want to include in their own collage pieces. All creative spaces can implement this activity as a way to organize the studio. In choice-based settings, facilitators can use this activity as an introduction and skill builder to opening the collage center. Students may even choose how to organize the magazine pages after completing the scavenger hunt. Get Prepared The first step to preparing for the magazine scavenger hunt is to determine how students will store their found magazine pages. If the students will utilize their own findings, give them paperclips and ziplocks for safekeeping. If this is for the class to share or studio storage, set up some bins with labels of each category. Set out stacks of magazines around the room for students to search. Remember- NO scissors! This is a fast-paced activity and waiting for students to cut out each item will take up too much time. Explanation Explain to students how the scavenger hunt will work. The facilitator will have a slide on the board that shows what subject, topic, element/principal of art, or idea students need to search for in the magazine. Stress to students that there is no cutting, just rip out the pages and then find another one. They will have 2 minutes in each category. Collecting and Keeping
If this is a collective effort for the studio, after the presentation of each category have students place their findings into the collective bin or tray. If this is an individual effort, have students label their ziplock and put it away for next time. FREE Google Slides Visit the Teachers Pay Teachers store to get your own free Google Slides copy of the Magazine Scavenger Hunt. You can edit this version to how you need it!
0 Comments
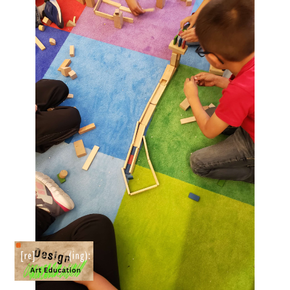
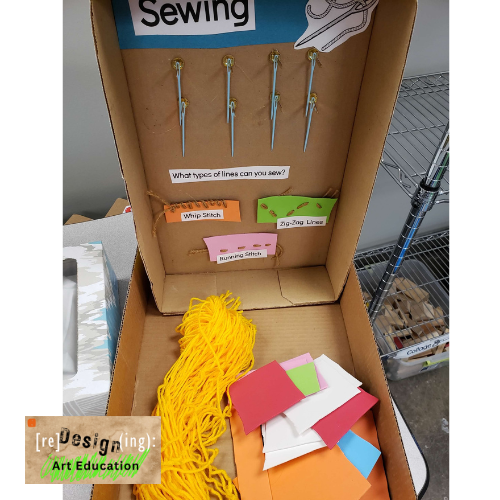
Kindness to self first [Re]Design(ing) an art curriculum begins with a compassionate focus on self-care. At the heart of the creative spaces is the facilitator or teacher, an important element in shaping the creative learning space. Prioritizing self-care is an act of kindness by doing so, educators also cultivate and foster a successful creative learning community. When teachers are at their best, the entire creative community benefits. In the next few sections, we will explore how to simplify the studio environment and instruction to lead towards a wholesome classroom community and improve a teacher’s well-being. Read Kindness to Self First: Passion-Driven Studio Pt. 1 HERE Streamlining elements and instructional practices in the creative space, particularly in choice and play-based setups, can significantly reduce stress for teachers. These spaces heavily rely on the environment as a key feature for the practice. Making simple reductions and transformations into the creative space environment will have a big impact on a teacher's well being and how students function and work independently in the space. Traditional choice-based studios focus on opening centers in an orderly fashion starting from 2D materials and moving towards 3D. There is a common misconception that choice-based art studios have to follow this linear progression of opening centers and choices available to students. This traditional practice may not fit a teacher’s passion and strengths and time with students. Start Unconventionally Following the traditional progression of opening centers may not allow an adequate allotted time for students to learn 3D, fiber, printmaking, or other unique art mediums. Many choice teachers find that after a few years of implementing a choice studio, students may get bored with the same progression of opening centers. It also depends greatly on a teacher's school rotation and scheduling. So, starting the year with an unconventional art medium will instantly engage students and ensure that efficient time will be available to teach the medium. In doing so, educators empower students to think beyond the conventional boundaries of artistic expression, encouraging them to embrace creativity in its various forms. Furthermore, by developing a new progression and sequence to the creative space, teachers may reignite and bring new excitement to their teaching practice and to students. Opening centers in unconventional ways can be exciting, yet it’s important to consider some cautionary advice. Teachers should take into account these two simple tips to have a successful opening of the creative space. Begin with Minimal Supplies When introducing the new center, focus on starting with minimal supplies. This approach will help students not feel overwhelmed and allows them to master foundational techniques. So, if the teacher is going to start with sewing, maybe start off with just a stitching demo that uses small cardstock or fabric. The intention of opening centers in this matter is to allow more time for ample learning. The teacher can revisit the center, providing further demonstrations, with the option of adding additional materials gradually. Provide Two, Low-Maintenance, Simple Choices Offer students a selection of two additional centers to kickstart their creative journey for the school year. There may be a potential influx of students that want to explore unconventional material choices, maintaining a balance in choices is crucial for the overall success of the creative space and the teacher’s sanity. These additional options should be easy to maintain and require minimal setup, allowing students to be independent. Drawing and blocks would be an example of low-maintenance centers for students. [re]Design your Curriculum Journal Page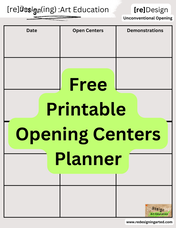 [re]Design your progression by using the scope and sequence table. Start by looking at the calendar and writing in the weeks of the school year. Plot out week-by-week a progression of opening centers/art materials to students. Start out with the most unexpected art material and medium! |


 RSS Feed